
Behind the Scenes of a Water-Damaged Soffit Repair
(And how we made it right!)
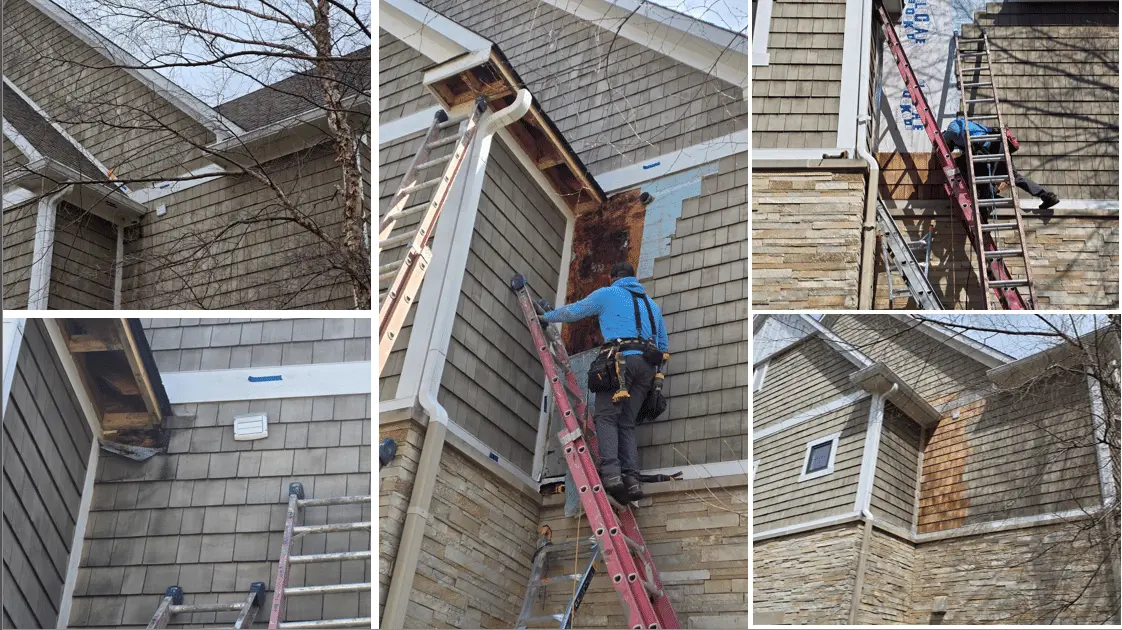
We’re not just about making homes look beautiful – we’re about protecting them, too. Here’s a recent project that highlights the importance of a thorough inspection and skilled craftsmanship in resolving hidden damage.
Step 1: The Initial Inspection
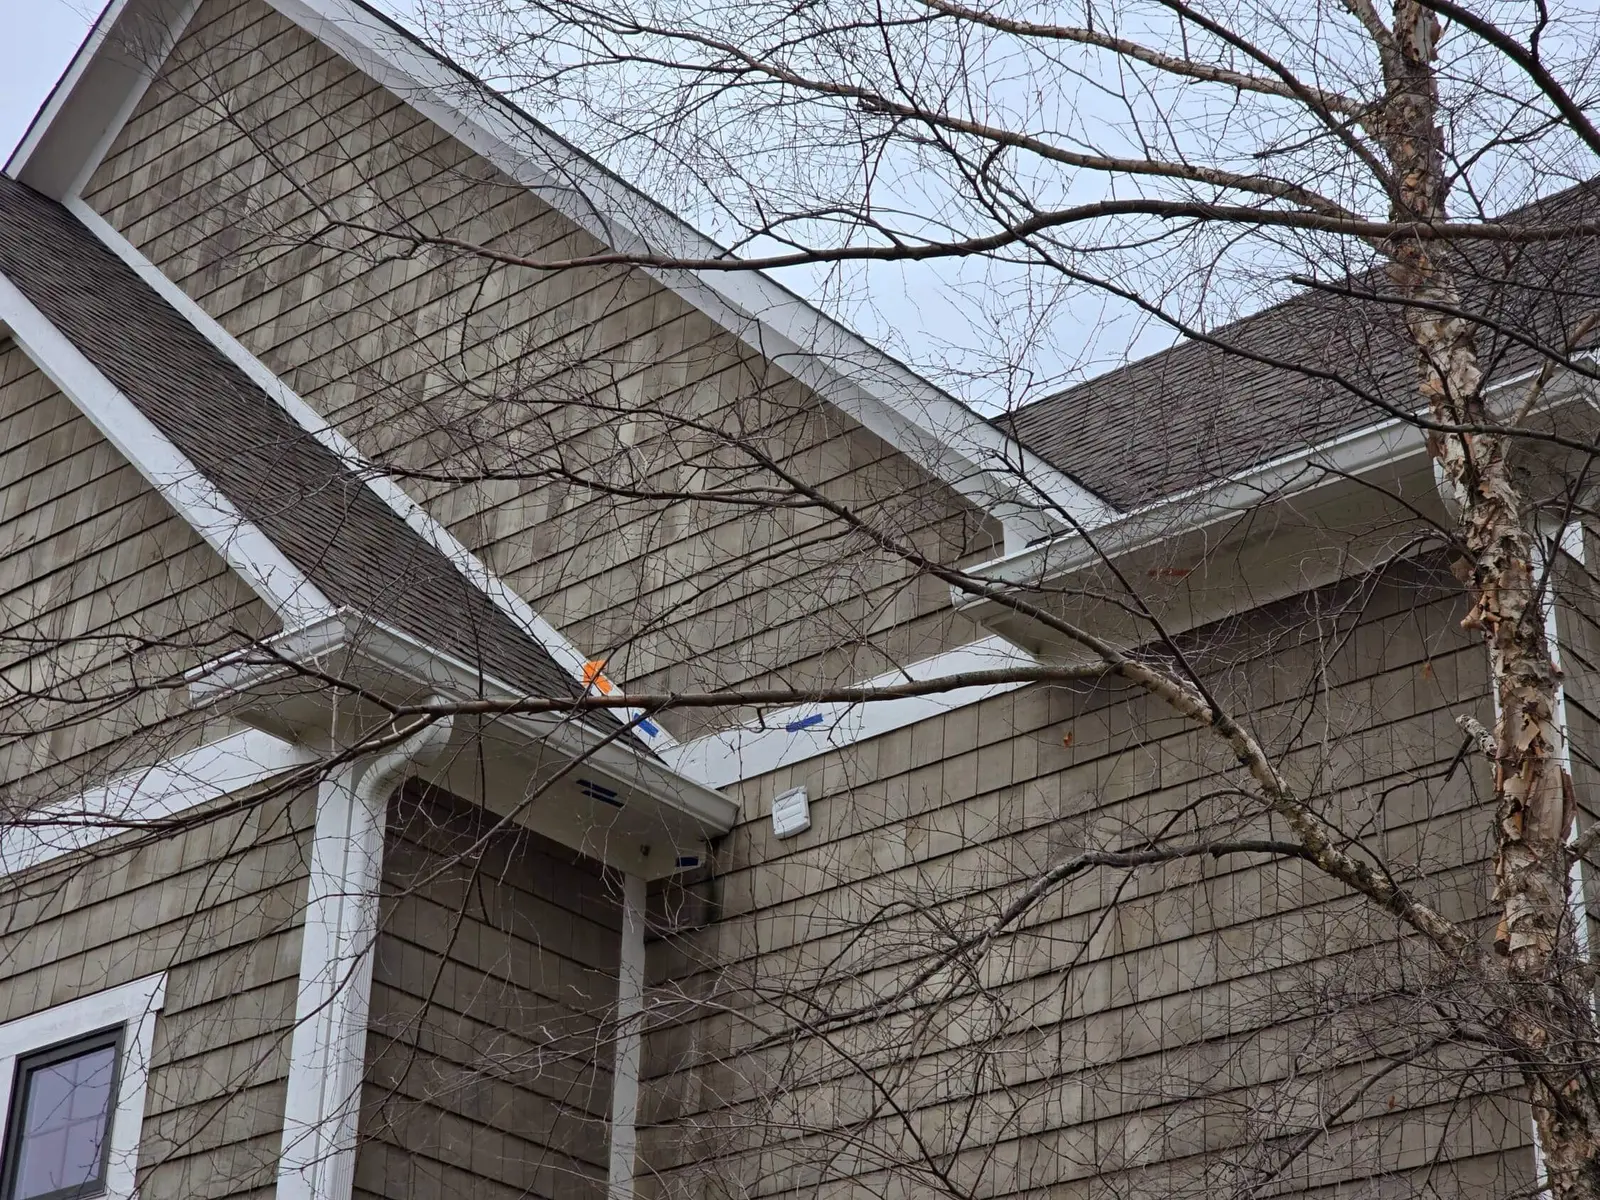
In our first visual inspection, we immediately noticed several red flags:
These issues aren’t just cosmetic—they’re indicators that water may be making its way into places it shouldn’t.
Step 2: Digging Deeper
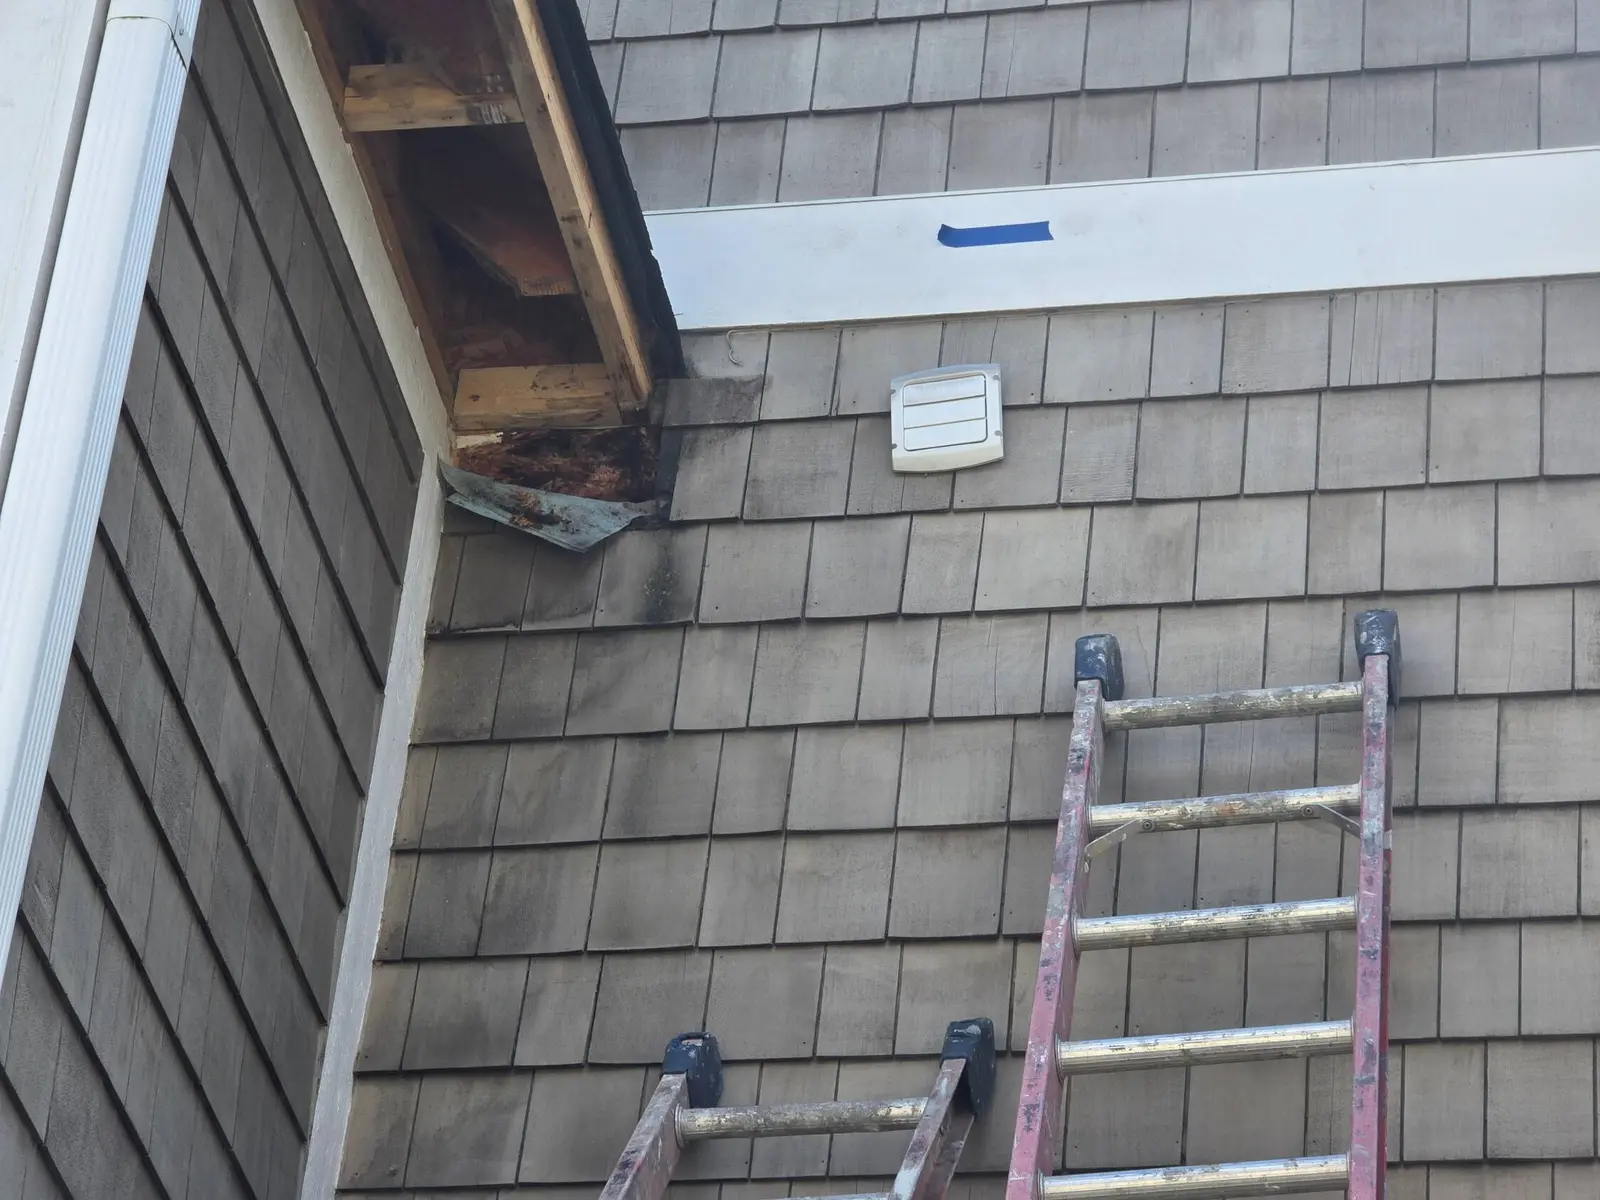
Once we removed the damaged gutter and soffit, the full extent of the problem became clear: water had made its way behind the siding. This kind of hidden damage is common when kick-out flashing is missing, as water gets trapped and begins to rot the materials from the inside out.
Step 3: Assessing the Damage
Further down, the situation worsened. Water damage and rotted plywood extended all the way to the stone foundation. Left unchecked, this kind of rot can compromise the structural integrity of a home and lead to costly repairs.
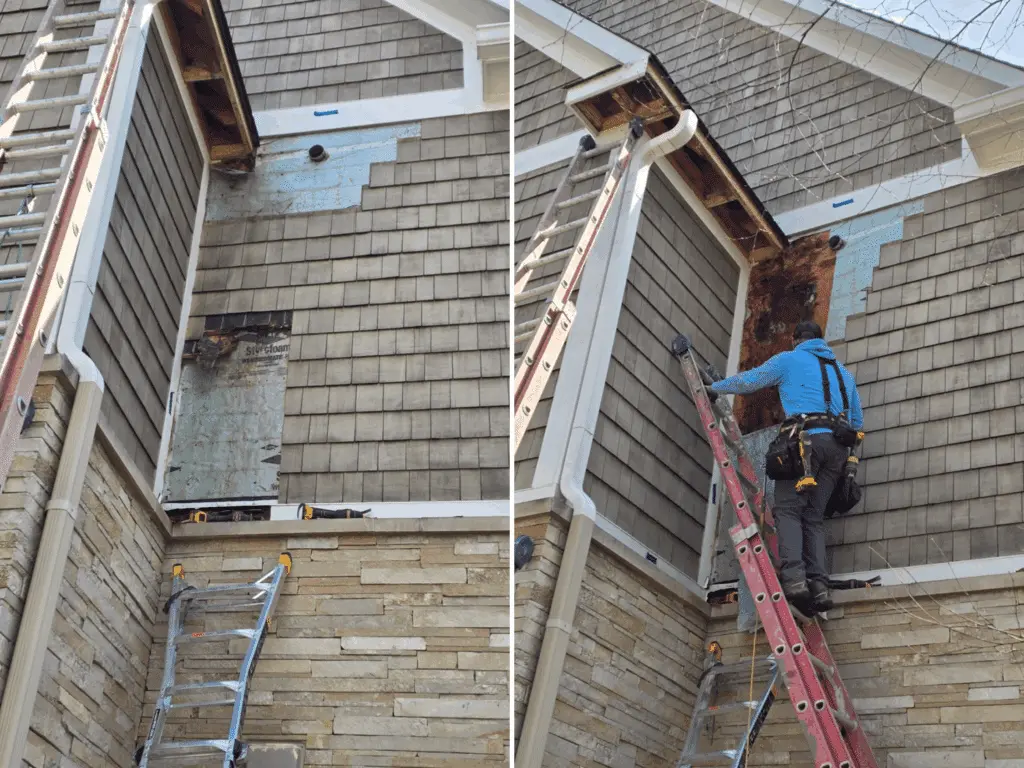
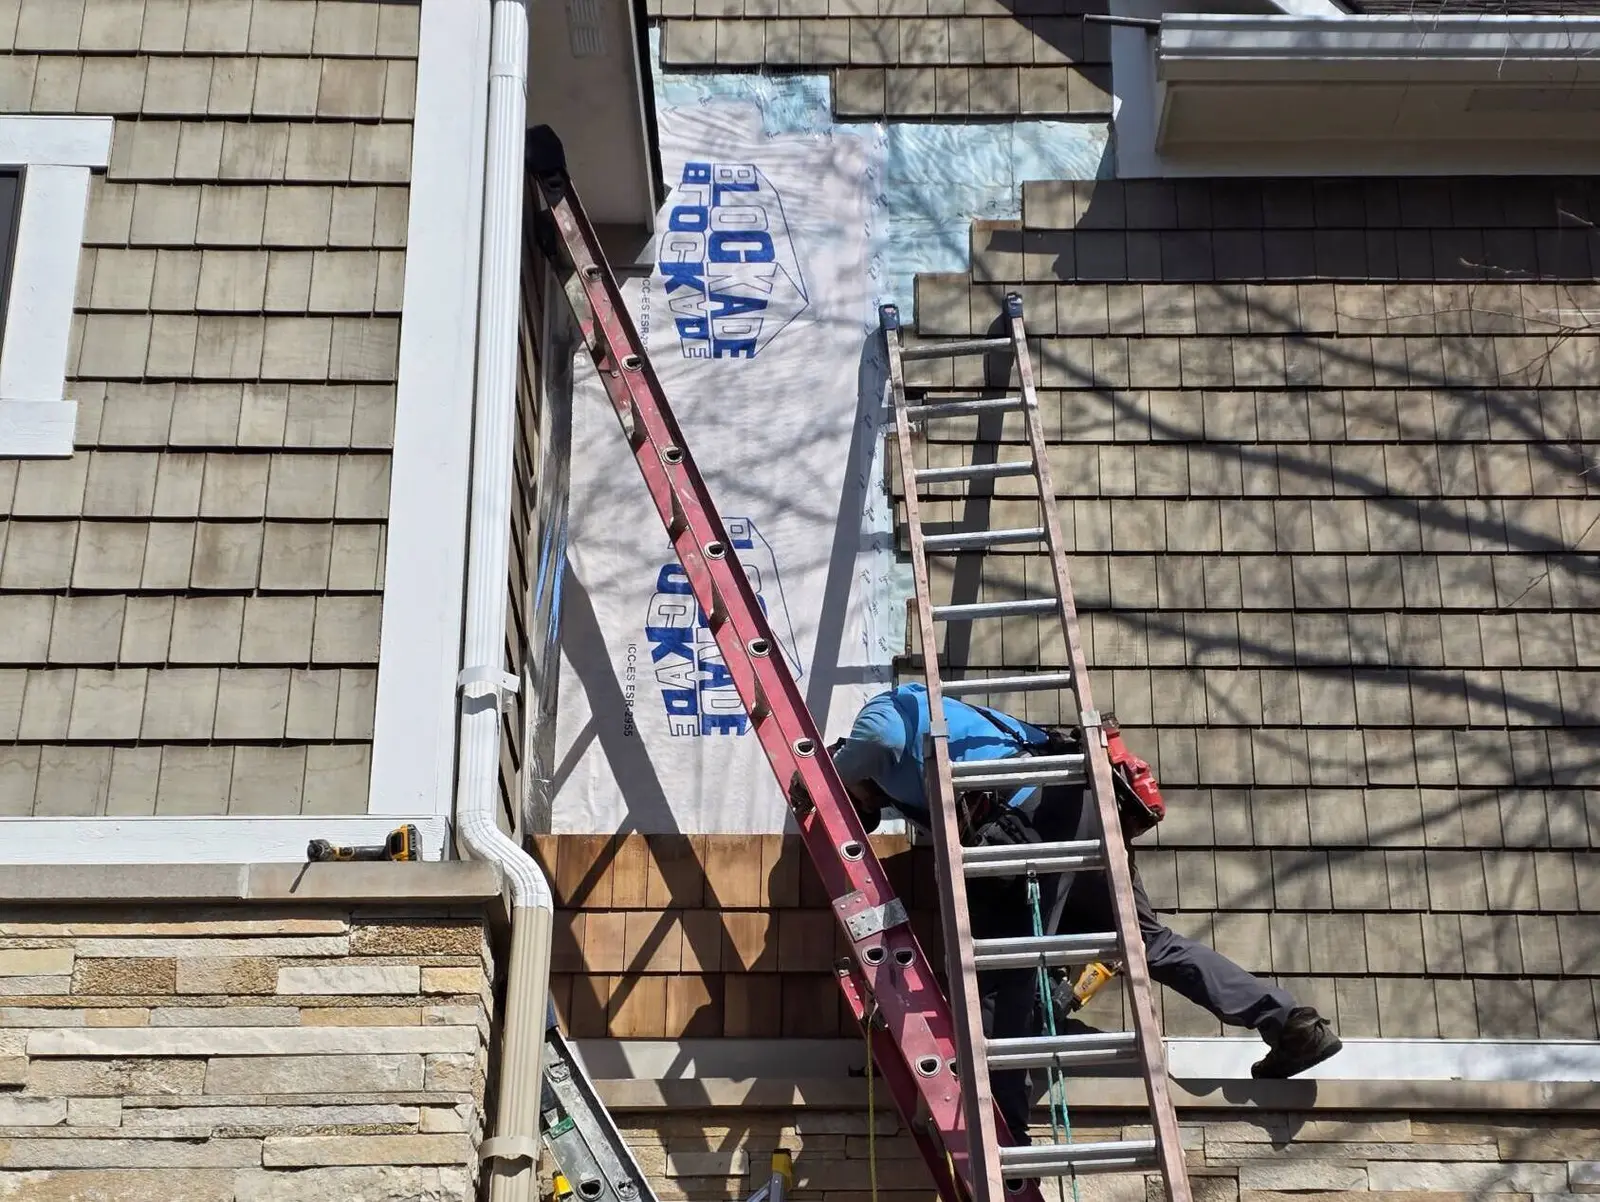
Step 4: Expert Repairs Done Right
We got to work, removing all the compromised materials. We installed:
This wasn’t just a patch job—it was a comprehensive solution designed to last.
Step 5: Ready for a Fresh Finish
With all the carpentry repairs complete, the home was ready for staining. But here’s a common concern: “Won’t the new siding look different from the old once it’s stained?”
We’ve got that covered, too. Our expert painters know how to blend new and existing siding so everything matches seamlessly. The result? A home that looks better than ever – and is protected for years to come.
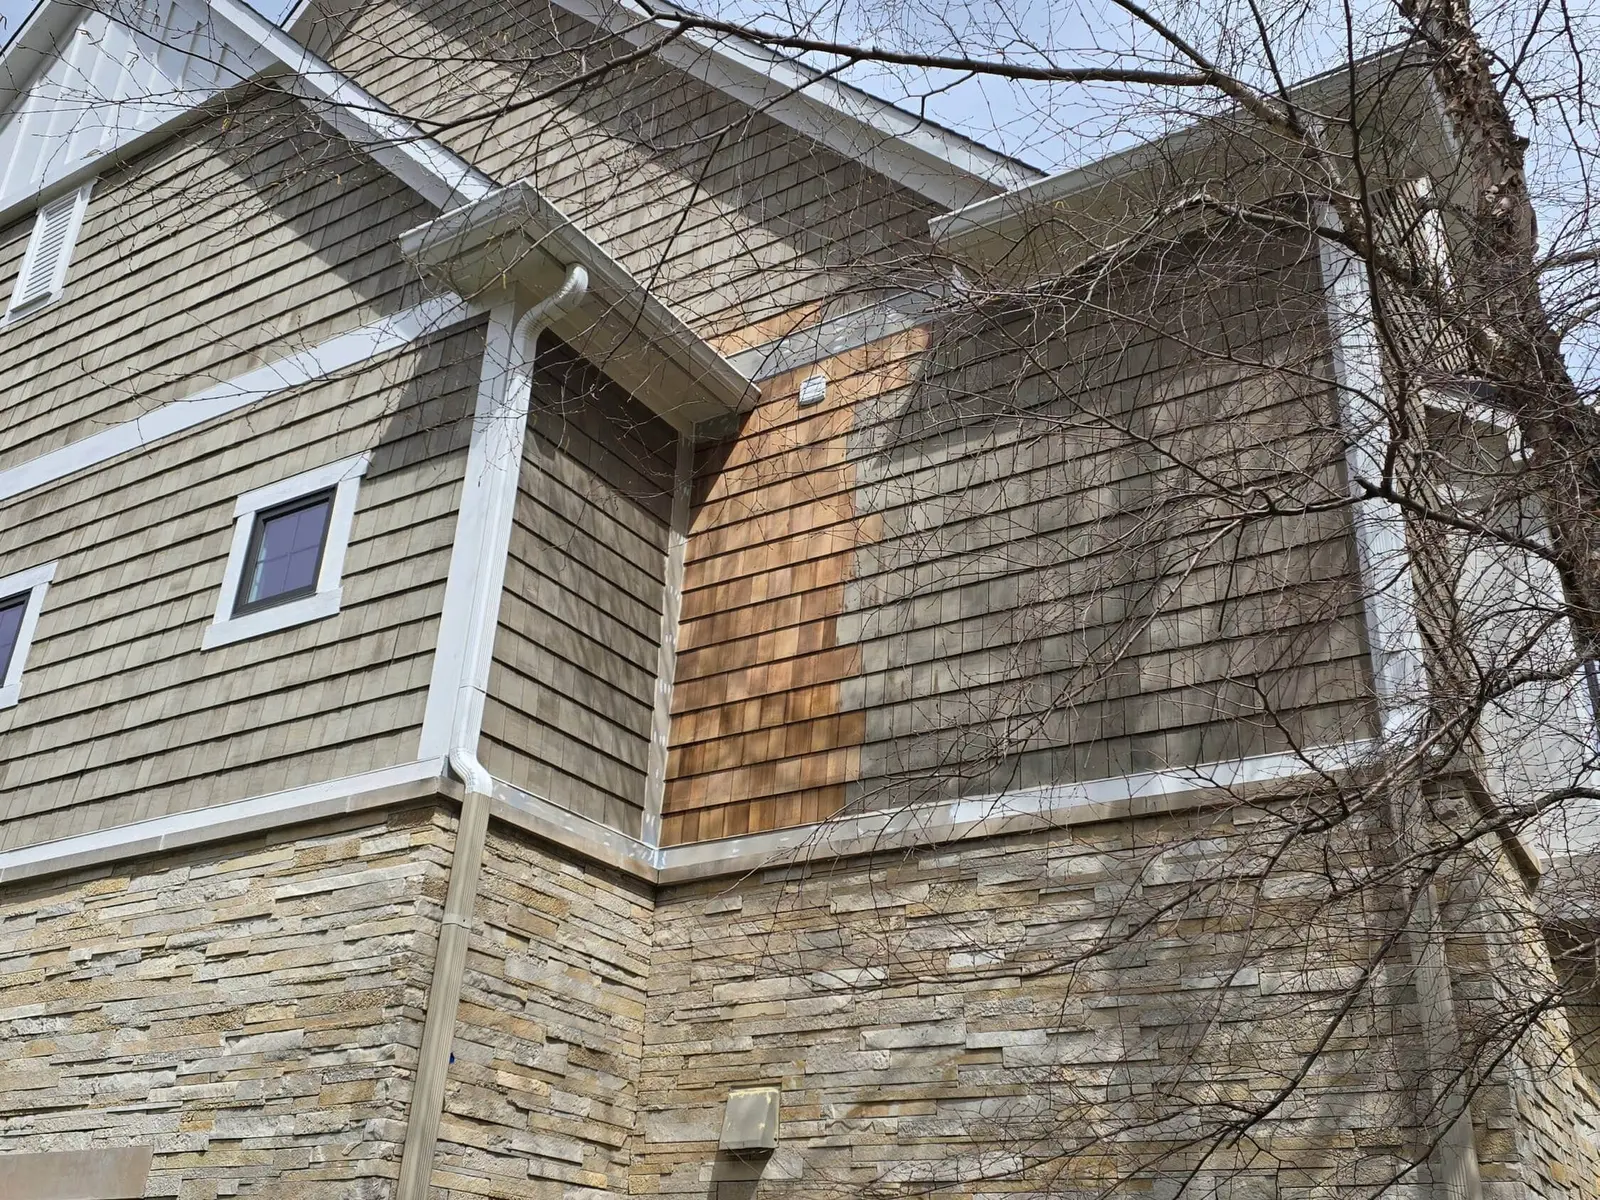
What started as a small issue revealed much more beneath the surface. Thanks to our thorough process and experienced team, this home is now stronger, safer, and ready to shine.
If you suspect your home might have water damage, or if have questions about your home’s exterior, don’t wait. Contact Guy Painting for a professional inspection today!
Learn more about Wood Replacement